

Best Slicker Brush for Doodles: 2026 Buying Guide
Table of Contents
- Why the Best Slicker Brush for Doodles Matters More Than You Think
- What to Look For in a Slicker Brush for Doodles
- Slicker Brush vs Comb: Building a Doodle Grooming Brush and Comb Kit
- How to Brush a Goldendoodle Without Causing Discomfort
- How Often to Brush a Doodle for a Mat-Free Coat
- Choosing the Best Brush for Goldendoodle Coats: Short, Long and Dense
- Common Slicker Brush Mistakes Doodle Owners Make
- Conclusion
- Frequently Asked Questions
Last Updated: October 19, 2026
Why the Best Slicker Brush for Doodles Matters More Than You Think
The right slicker brush does more for a doodle than any other tool in your cupboard. A doodle's curly or fleece coat traps loose hair close to the skin, and that hair wraps around itself into small knots long before you can see them. A slicker brush with the right pins reaches under that top layer and lifts the loose hair out before it tangles.
At Dexter And Billy Co, we spend most of our time helping everyday owners understand why doodle coats mat, and how small, calm habits prevent it. The brush is the centre of that routine.
Below, we break down what separates a good slicker brush from a bad one, how to brush a Goldendoodle gently, and how often you need to do it.
What to Look For in a Slicker Brush for Doodles
A good doodle brush has three things: pins long enough to reach the undercoat, pins flexible enough not to scratch skin, and a handle you can hold comfortably for ten minutes. Miss any of those and the brush either skims the surface or makes your dog flinch away.
Pin Length, Flexibility and Density
Pin length matters more than brand. Long, soft pins suit doodles with longer, wavy coats because they reach down to the skin without dragging. Shorter, firmer pins work better on dense, tightly curled coats where you need a little more bite to separate the hair.
Flexibility is the difference between a brush your dog leans into and one they walk away from. Pins that bend slightly under pressure glide over bony areas like the spine and hips. Stiff pins on those spots cause discomfort, and a dog that associates brushing with discomfort will not stand still for it.
Density affects how much coat you can work through in one pass. Dense pin clusters cover more ground but can pull if the coat is already tangled. Sparse clusters are gentler but slower. For most doodles, a medium-density brush with long, flexible pins is the sensible starting point.
Handle Comfort and Grip
You will hold this brush for years, so grip matters. Look for a handle with a slight contour and a rubberised or textured surface. Smooth plastic handles become slippery when your hands are damp from a bath or a detangling spray.
Weight is the other factor. A heavy brush tires your wrist during longer sessions, especially on a large Goldendoodle. Lighter brushes are easier to control around the face, paws and tail base, which are the fiddly areas where most knots start.
Slicker Brush vs Comb: Building a Doodle Grooming Brush and Comb Kit
A slicker brush alone will not keep a doodle mat-free. The brush lifts and separates the coat; the comb proves whether you got all the way down to the skin. You need both, and they do different jobs.
Here is how a simple doodle grooming brush and comb kit breaks down:
| Tool | What It Does | When to Use It | What to Look For |
|---|---|---|---|
| Slicker brush | Lifts loose hair and separates the top coat | Daily or every other day | Long, flexible pins; comfortable grip |
| Metal comb | Checks whether you reached the skin | After every brushing session | Rotating teeth; medium-to-coarse spacing |
| Detangling spray | Softens knots before brushing | On dry, knotty or static-prone coat | Apply to wet or dry hair, no rinsing necessary |
| Leave-in conditioner | Adds slip and shine between baths | Weekly or before a full brush-out | All-natural ingredients, gentle and safe for regular use |
The comb is the honest one. Run it through the coat after brushing. If it glides through without catching, you reached the skin. If it snags, the slicker brush only skimmed the surface and there is still a knot underneath.
How to Brush a Goldendoodle Without Causing Discomfort
Brushing a Goldendoodle gently comes down to three habits: work in small sections, brush in the direction the coat grows, and stop before your dog tells you to. Most owners brush too hard and too fast, then wonder why their dog hides when the brush comes out.
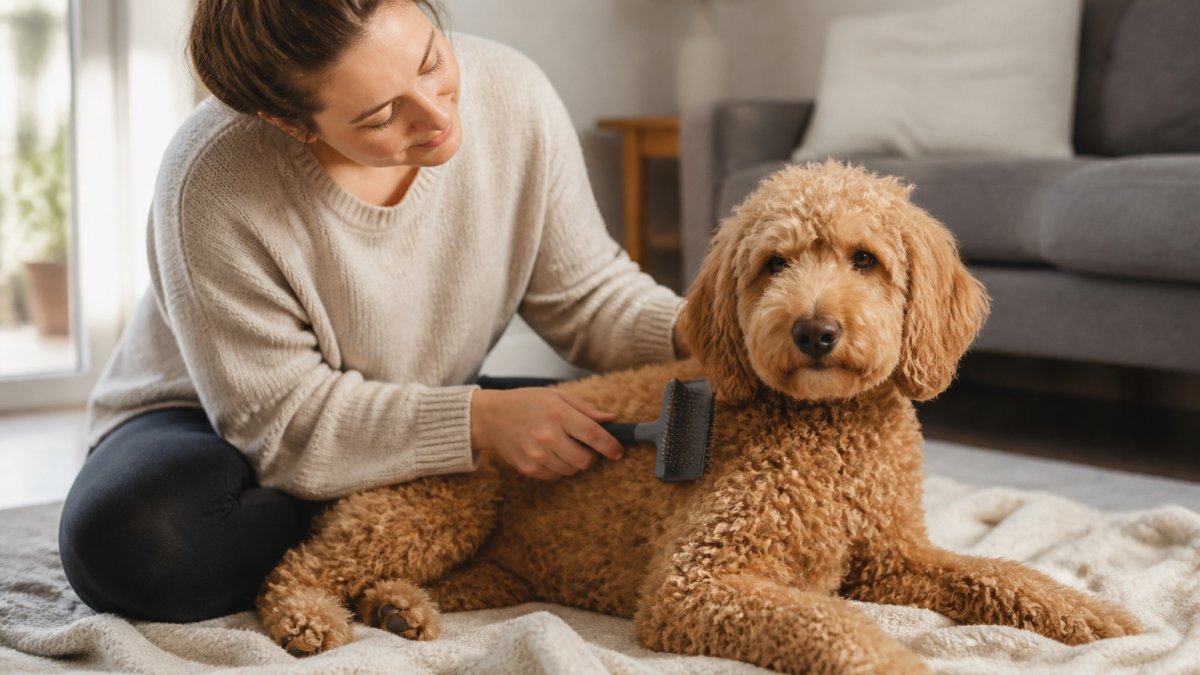
Start with a settled dog. Pick a time when your doodle is tired or relaxed, and keep sessions short at first. Work one small section at a time, lifting the hair with one hand and brushing with the other so you can see the skin underneath.
Keep the brush moving in the direction of hair growth, and use light pressure. Let the pins do the work rather than pressing down. If you hit a knot, do not tug.
Watch your dog, not the clock. A doodle that keeps turning to look at the brush, licking their lips, or trying to walk away is telling you the session has gone on long enough. End on a calm note, even if you have not finished the whole coat.
How Often to Brush a Doodle for a Mat-Free Coat
Most doodles need brushing every day to every other day, with a full comb-check at least twice a week. Curly and fleece coats mat from the inside out, so a coat that looks fluffy on the surface can already be knotted underneath.
How often to brush a doodle depends on coat length and density rather than breed name. A short summer clip needs less frequent brushing. A longer, denser coat needs daily attention, particularly in the trouble zones. Puppies and senior dogs often need shorter, gentler sessions rather than fewer of them.
Finally feel confident grooming your dog at home. →
If you can only manage ten minutes a few times a week, that is still worth doing, as long as you spend it on the high-risk areas. A quick check behind the ears and under the harness line catches most early tangles before they tighten.
Choosing the Best Brush for Goldendoodle Coats: Short, Long and Dense
The best brush for Goldendoodle coats changes with the coat in front of you. There is no single brush that suits every doodle, and buying three before you know your dog's coat type is how most owners end up with a drawer full of unused tools.
For a short, clipped doodle coat, a medium-pin slicker brush is plenty. The coat is easy to reach, so you do not need long pins, and a firmer brush gives you more control.
For a longer, wavy coat, go for long, flexible pins. These coats tangle in soft, loose knots that a long pin lifts out easily. Pair the brush with a detangling spray on dry coat to add slip before you start.
For a dense, tightly curled coat, you want a brush with slightly firmer pins and good density, plus a metal comb for the comb-check. Dense coats hide knots close to the skin, so the comb is doing as much work as the brush.
If you are not sure which category your dog falls into, our Calm Dog Grooming & Coat Care Guide walks through coat types step by step, including how to choose tools without overbuying.

Common Slicker Brush Mistakes Doodle Owners Make
The most common slicker brush mistakes are brushing the top layer only, pressing too hard, and skipping the comb-check. Each one leaves knots behind that tighten over the following days, which is why some owners feel like they brush constantly and still find mats.
Brushing the surface is the big one. A slicker brush gliding over the top of a doodle coat looks productive but never reaches the undercoat. Line brushing, where you lift the coat and work underneath, is the fix.
Pressing too hard is the second. Stiff pressure on flexible pins pushes them flat against the skin, so they stop separating hair and start scratching. Light strokes with the pins doing the work are more effective and far kinder.
Skipping the comb is the third. Without a comb-check, you have no way of knowing whether the brush reached the skin. The comb is your quality control, and it takes thirty seconds.
If mats keep returning to the same spots, a structured routine helps more than a new brush. Our No More Mats: Curly Coat Care Reset sets out a 21-day plan with brush-and-comb guidance, bathing and drying advice, and clear guidance on when to stop and ask a groomer for help.


Conclusion
The best slicker brush for doodles is the one that reaches your dog's skin without causing discomfort, backed by a comb and a routine you can keep. Most matting comes down to missed spots and skipped comb-checks, not the wrong brush.
If you want a calmer, clearer path through doodle coat care, our digital guides and printable workbooks give you gentle, step-by-step routines built for everyday owners. Start with the Calm Dog Grooming & Coat Care Guide and add the No More Mats reset if mats keep returning. Add to basket.
Frequently Asked Questions
What is the best slicker brush for a Goldendoodle?
There is no single winner, because the best slicker brush for doodles depends on coat length and density. Look for a brush with flexible pins long enough to reach the skin, a comfortable grip, and pins that are not too sharp. A slicker brush alone will not keep a Goldendoodle mat-free, so pair it with a metal comb to check your work. Our Calm Dog Grooming & Coat Care Guide walks you through choosing tools without overbuying.
What size slicker brush should I use for my doodle?
Match the brush head to your dog's size and coat. A small or medium slicker brush suits puppies, faces, legs and paws, while a larger head covers the back and flanks faster on a full-grown doodle. Many owners keep two sizes: a small one for fiddly areas and a larger one for the body. A brush that is too big for the area you are working on makes line brushing clumsy and can pull the coat.
Should I use a slicker brush or a comb on my doodle?
Use both. A slicker brush loosens surface tangles and lifts the coat, while a metal comb checks whether the brush actually reached the skin. Run the comb through after brushing; if it snags, go back over that section. This doodle grooming brush and comb routine is the most reliable way to catch mats early. Our No More Mats: Curly Coat Care Reset guide sets out the full brush-and-comb method step by step.
How often should I brush my doodle?
Most doodles need brushing every one to two days, with a full line-brush session two or three times a week. Curly and fleece coats tangle quickly, especially behind the ears, under the collar and around the harness line. Short daily sessions of five to ten minutes work better than one long weekly brush. If you are unsure where to start, our free Curly Coat Matting Starter Guide shows the high-risk areas to check first.
How can I tell whether a slicker brush is reaching through my doodle's coat?
The comb test is the simplest check. After brushing a section, glide a metal comb through it. If the comb passes smoothly from skin to tip, the brush reached through. If it catches, the slicker brush only skimmed the surface. Part the coat and look at the skin line too, since mats often form underneath a fluffy top layer. Stop and seek professional help if you find tight, painful mats.