

Prevent Mats in Curly Dogs: A Step-by-Step Guide
Table of Contents
- Why Curly Coats Mat and Where to Check First
- Best Brush and Comb for Curly-Haired Dogs
- How Often to Groom a Curly Dog
- Step-by-Step Detangling Process for Matted Fur
- How to Dry a Curly-Coated Dog Without Creating Mats
- Signs a Dog Mat Needs Professional Grooming
- Building a Realistic Daily Grooming Routine
- Conclusion
- Frequently Asked Questions
Last Updated: October 10, 2026
Why Curly Coats Mat and Where to Check First
Curly and wavy coats mat because the hair texture naturally tangles at the root, which is why learning to prevent mats in curly dogs is essential for any owner. Unlike straight coats, curly hair grows in a tighter spiral.
Mats start small and hidden. You might not see them until they're already uncomfortable for your dog. The real problem is that mats trap moisture against the skin, which can lead to irritation and infection.
Here's where mats hide first:
- Behind the ears
- Under the collar or harness line
- In the armpits
- Around the belly and back legs
- At the tail base
- Between the toes and paw pads
A quick 5-minute check twice a week catches tangles before they become mats. Run your fingers through these spots and feel for knots close to the skin. If you find resistance, stop and investigate gently.
Best Brush and Comb for Curly-Haired Dogs
The right tools make a massive difference. Most people grab whatever brush is on the shelf. Then they wonder why grooming feels impossible.
Slicker brushes for dense coats
A slicker brush has short, fine wires packed closely together on a flat or slightly curved surface. This is your primary tool for curly coats.
Choose a slicker brush with:
- Fine, short wires (not coarse)
- A comfortable handle you can grip for 10-15 minutes
- A size that fits your hand (medium works for most dogs)
Slicker brushes work by separating hair at the root level. They're gentle enough for daily use but effective at catching tangles early. Avoid cheap versions with loose wires, they pull and hurt.
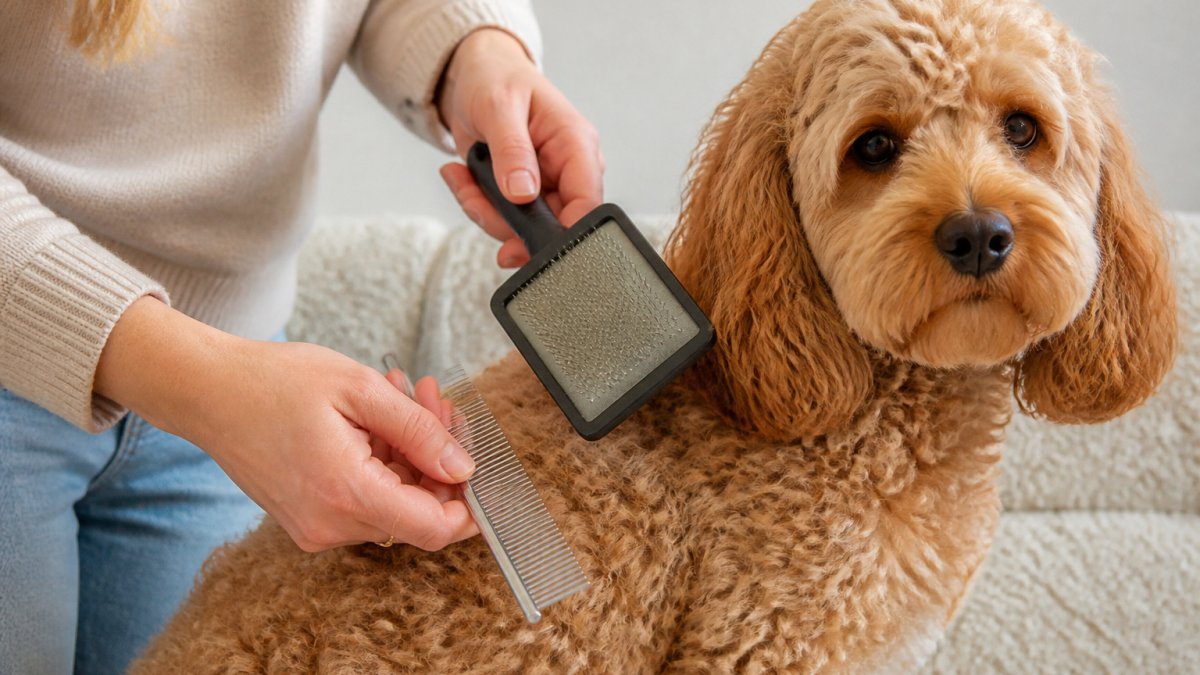
Metal combs for checking tangles
A metal comb is your detective tool. After you brush, comb through the same areas to check for remaining tangles.
Use a comb with:
- Wide teeth on one end (for initial passes)
- Fine teeth on the other end (for detail work)
- Rounded tooth tips (sharp edges catch and hurt)
The comb catches what the brush misses. If the comb glides through smoothly, you're done. If it catches, you've found a tangle that needs more attention.
Dematting tools for early knots
A dematting tool (also called a mat splitter or undercoat rake) has sharp blades that cut into mats without damaging surrounding hair.
Only use dematting tools on:
- Small, early-stage tangles
- Mats that are still loose and movable
- Areas where you can see daylight between the mat and skin
Never use these on mats that are tight against the skin or painful to touch. That's when professional help is essential.
How Often to Groom a Curly Dog
How often to groom a curly dog depends on your dog's coat density and how much time you can realistically commit.
Daily grooming works best for most curly-coated dogs. A proper daily routine takes 10-15 minutes and prevents 90% of matting problems. This doesn't mean a full bath and dry, it means a quick brush and comb check of trouble zones.
Minimum frequency:
- Daily brush and comb check (5 minutes)
- Weekly full-body brushing (15-20 minutes)
- Professional groom every 6-8 weeks
If you can only manage three times a week, focus on the high-risk areas: behind ears, armpits, tail base, and paws. These spots mat first.
The goal isn't to groom like a professional. The goal is to catch tangles before they become mats. That's something every dog owner can do.
Step-by-Step Detangling Process for Matted Fur
Identifying safe mats to work on at home
Before you start detangling, decide whether the mat is safe to work on yourself.
Safe mats are:
- Loose and movable
- Not painful when touched
- Small enough to fit between your fingers
- Not tight against the skin
- In areas where you can see daylight between mat and skin
Unsafe mats need professional help:
- Tight and immovable
- Painful or sensitive to touch
- Close to the skin (risk of cutting skin)
- Large and dense (impossible to detangle without pain)
- Near the eyes, ears, or sensitive areas
If you're unsure, ask your groomer. They can tell you in seconds whether it's safe to tackle at home.
Gentle detangling technique
Step 1: Mist with water or detangling spray
Dry mats are harder to work with. Lightly mist the mat with water or a dog-safe detangling spray. Don't soak it, just dampen it enough to soften the tangle.
Step 2: Hold the base of the mat
Pinch the mat close to the skin between your thumb and finger. This prevents pulling on the hair root, which causes pain and damage.
Step 3: Work from the outside in
Start at the outer edge of the mat. Use your fingers or a metal comb to gently separate individual hairs from the outer edge. Work slowly toward the centre.
Step 4: Use a dematting tool if needed
Once you've loosened the outer edges, use a dematting tool to cut through the remaining tangle. Cut parallel to the skin, not perpendicular.
Step 5: Comb through
Stop the mat cycle. 21-day curly coat reset guide. →
After detangling, run your metal comb through the area. It should glide smoothly with no resistance.
When to stop and seek professional help
Stop immediately if:
- Your dog shows pain or anxiety
- You've been working on one mat for more than 10 minutes
- The mat is so tight you can't separate any hairs
- Your dog's skin is red or irritated
- You're unsure whether you're causing discomfort
Professional groomers have tools and experience you don't. They can detangle in situations where home care risks injury. It's not a failure to ask for help, it's the right choice for your dog.
How to Dry a Curly-Coated Dog Without Creating Mats
Drying is where many owners accidentally create new mats. A wet curly coat is vulnerable.

Never rub with a towel. This tangles wet hair and creates mats instantly.
Instead, follow this process:
-
Squeeze gently, Use a towel to gently squeeze water out. Don't rub or wring.
-
Let air dry partially, Allow your dog to air dry for 30-60 minutes before brushing. Wet hair is fragile and breaks easily.
-
Brush while damp, not soaking, Once the coat is damp (not dripping), brush gently with your slicker brush. Work section by section, starting at the edges.
-
Comb-check as you go, After each brushed section, run your metal comb through to catch any tangles forming.
-
Use a dog-safe dryer on low heat, If you use a dryer, keep it on low heat and low speed. High heat and speed tangle hair and stress your dog.
Many owners skip the brushing-while-damp step and let the coat dry completely. Then tangles set in permanently. The key is gentle brushing while the coat is still damp enough to work with.
Signs a Dog Mat Needs Professional Grooming
Some mats are beyond safe home care. Knowing the difference saves your dog from pain and potential skin damage.
Your dog needs professional help when:
- The mat is so tight you can't fit a comb through it
- The mat is painful to touch (your dog yelps or pulls away)
- The mat is close to the skin with no visible gap
- The mat is large and covers a significant area
- Your dog is anxious or aggressive during grooming attempts
- The mat has been there for weeks and is deeply embedded
- You've tried detangling for more than 10 minutes without progress
Professional groomers can assess whether a mat can be safely detangled or needs to be clipped out.
A professional groom every 6-8 weeks prevents most severe matting. Between appointments, your daily routine keeps things manageable.
Building a Realistic Daily Grooming Routine
The best routine is one you'll actually do. Perfection doesn't exist in dog grooming.

A realistic daily routine takes 10-15 minutes and will help prevent mats in curly dogs:
| Task | Time | Frequency |
|---|---|---|
| Quick brush of trouble zones | 5 minutes | Daily |
| Metal comb check | 3 minutes | Daily |
| Full-body brush | 15-20 minutes | 2-3 times weekly |
| Bath and dry | 45-60 minutes | Every 4-6 weeks |
Start with just the 5-minute daily check. Once that becomes habit, add the full brush session twice a week.
Make it easier:
- Keep your brush and comb in one spot (not scattered around)
- Groom at the same time each day (after a walk, before bed)
- Break it into smaller sessions if your dog gets restless
- Reward your dog with treats during grooming
- Set a phone reminder until it becomes automatic
If you're feeling overwhelmed by grooming, you're not alone. Our 21-day Curly Coat Care Reset guide walks you through a structured routine that actually fits into a busy life.
If you're just starting out, our free Curly Coat Matting Starter Guide shows you exactly where mats hide and how to spot them early.

For a broader foundation, our Calm Dog Grooming & Coat Care Guide covers all coat types and helps you build confidence with grooming in general.
Conclusion
Preventing mats in curly dogs comes down to one simple truth: consistency beats intensity. A 10-minute daily routine stops 90% of matting problems before they start.
You don't need to be a professional groomer. You need to know where mats hide, have the right tools, and commit to regular checks. When you catch tangles early, detangling takes minutes.
Start with the trouble zones. Check behind the ears, armpits, and tail base twice a week. Brush gently and comb through after. If you find a tangle, work it out while it's still small.
If grooming still feels overwhelming, structured guidance helps. The No More Mats: Curly Coat Care Reset gives you a 21-day plan with daily checks, bathing advice, and groomer communication scripts.
Frequently Asked Questions
How often should you brush a curly-coated dog to prevent mats?
Most curly-coated dogs need brushing 3-4 times per week to prevent mats from forming. Dogs with denser coats may need daily attention, especially in high-friction areas like behind the ears, under the collar, and around the harness line. Consistency matters more than duration, a 10-minute session several times weekly is more effective than an occasional longer session. If your dog swims or gets wet frequently, brush after each bath or wet walk to prevent matting whilst the coat is damp.
What type of brush is best for preventing mats in curly dogs?
A slicker brush is the most effective tool for curly coats, as it reaches through dense fur to catch knots before they tighten. Follow up with a metal comb to check for tangles you may have missed. These two tools work together: the slicker brush tackles larger areas, whilst the comb finds early-stage mats in trouble zones. Avoid regular brushes with widely spaced bristles, as they won't penetrate curly coats effectively and can miss developing mats entirely.
Can you prevent mats in severely neglected curly coats?
Severe matting often requires professional grooming to remove safely without damaging the coat or skin. However, once a groomer has reset the coat, you can absolutely prevent mats from returning by following a consistent routine. The No More Mats: Curly Coat Care Reset guide walks you through the exact steps to maintain a mat-free coat after professional grooming, including daily trouble-zone checks and proper drying techniques. Prevention is far easier than rescue, so starting a routine immediately after professional grooming is key.
Should you brush a curly dog before or after a bath?
Always brush before a bath to remove existing mats and tangles. Brushing a wet or damp coat can tighten knots and cause matting. After bathing, use a gentle approach: towel dry carefully without rubbing, then use a wide-tooth comb on damp fur before blow-drying. Proper drying technique is crucial, mats can form quickly in damp curly coats if you don't dry thoroughly, section by section, working the comb through as you go.
Your curly-coated dog's coat is manageable. It just needs the right approach and consistency.